How To Draw A Bow Tie
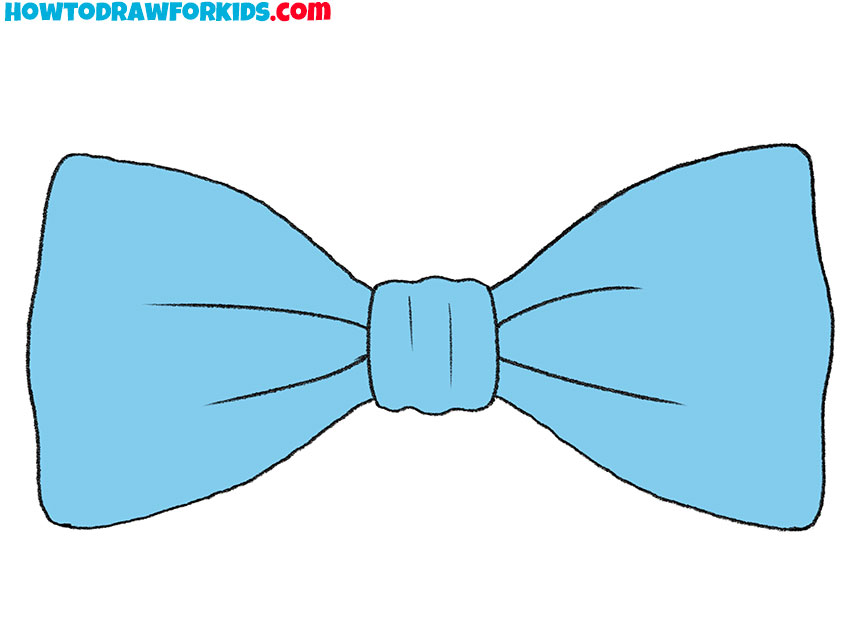
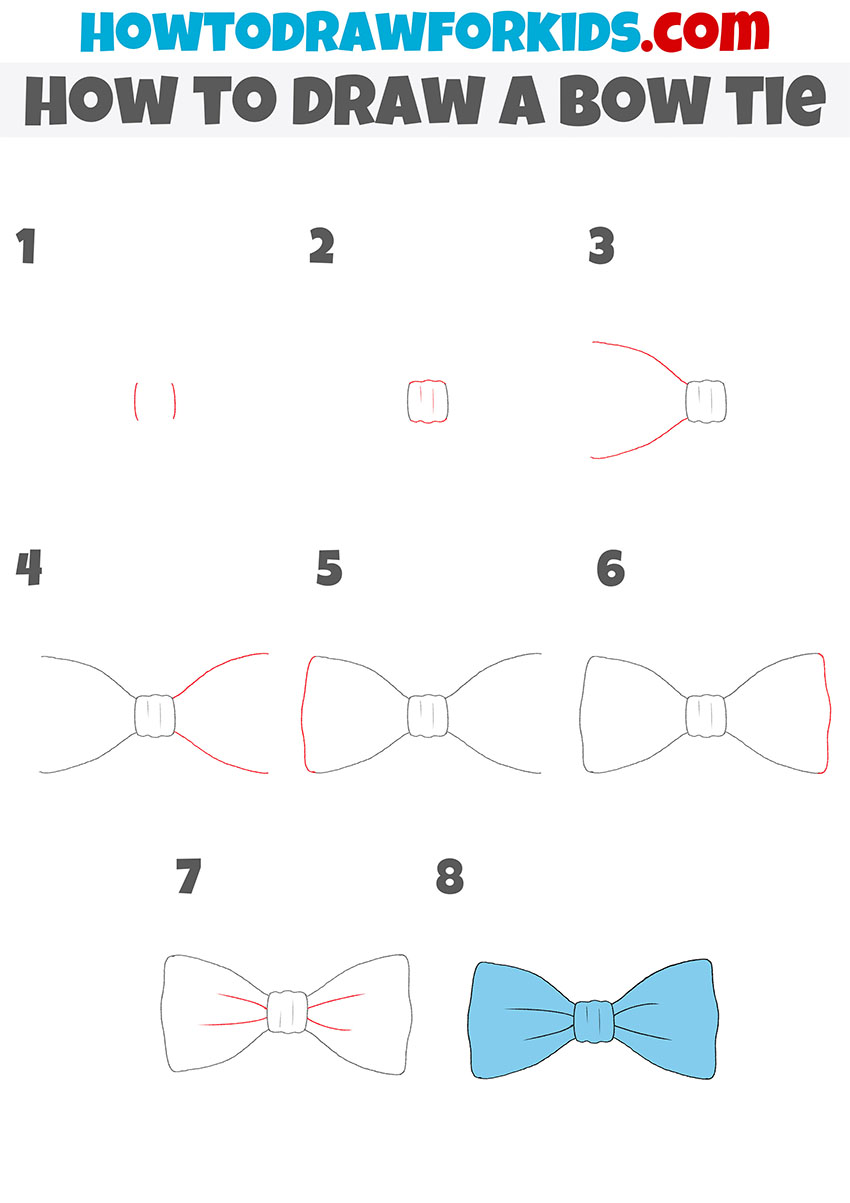
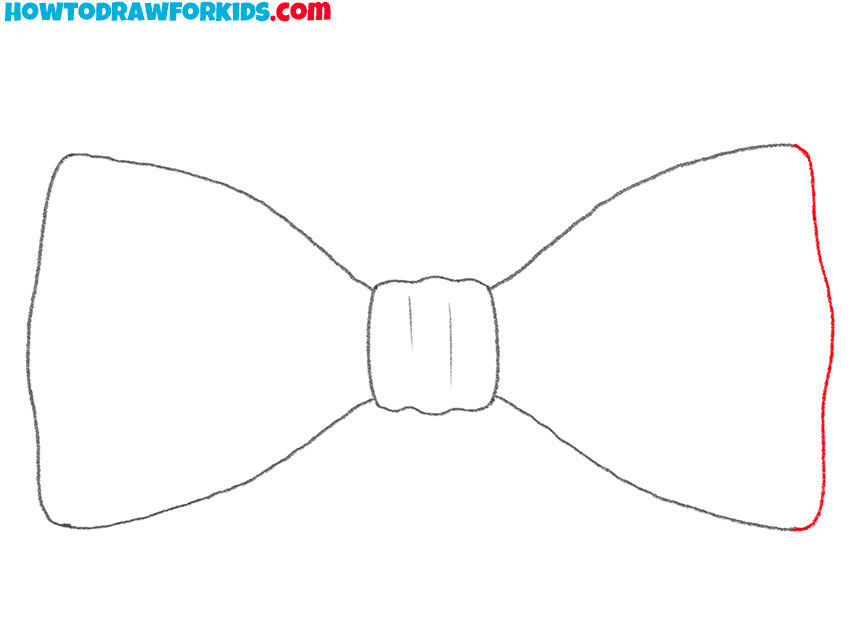
How To Draw A Bow Tie - Go ahead and add a bit more detail to make your bow look pretty. On the right, connect both lines with a single outwardly rounded line. Learn to draw a bow tie. It consists of a ribbon of fabric tied around the collar in a symmetrical manner such that the two. Draw a long, curved line extending from one side of the knot. Draw two symmetrical lines from the knot, as shown in the example. Then, draw a slightly larger oval around the first one. Simply knot the middle and add a few accessories to give. In very little time, through a little repetition, you'll have the perfect bow tie drawing. Kids and beginners alike can now draw a great looking cartoon bow tie. The next step is to. Learn to draw a bow tie. To give the knot a realistic appearance, round off the corners of the rectangle slightly. Web how to draw a bow tie. Web draw a small horizontal line for the center of the bow tie. Draw a long, curved line extending from one side of the knot. Go ahead and add a bit more detail to make your bow look pretty. From one side of the rectangle, draw. How to draw a bow tie easy step by stepsubscribe ️ ️ ️the bow tie /boʊ/ is a type of necktie. This forms one side of the bow tie itself. Coming out of one side of the knot draw the first loop of the tie. You can do so by drawing two curved lines on either side of the shapes from before. In very little time, through a little repetition, you'll have the perfect bow tie drawing. Web draw a small horizontal line for the center of the bow tie.. Web start with drawing the center piece of the bow shape. The next step is to. The corners of the middle of the bow square are rounded. Web how to draw a bow tie.the bow tie is a type of men's necktie. On the right, connect both lines with a single outwardly rounded line. For this guide on how to draw a tie, you will find it much easier if you have a ruler to use, as there are lots of straight lines in this design. Repeat the above instructions on the left side. Make it narrower towards the knot and wider as it goes. Add another layer by with a rounded. Draw an. Start by sketching a rectangle shape, tilted at an angle. Web draw two wavy lines at the top and bottom. Repeat the above instructions on the left side. Draw a long, curved line extending from one side of the knot. This forms one side of the bow tie itself. Repeat the above instructions on the left side. Sketch two triangles on either side of the line for the bow’s loops. Draw a square in the middle of the page. Web start with drawing the center piece of the bow shape. Web it will represent the knot of the bow tie. For this guide on how to draw a tie, you will find it much easier if you have a ruler to use, as there are lots of straight lines in this design. It consists of a ribbon of fabric tied around the collar in a symmetrical manner such that the two. Web draw two wavy lines at the top and. Draw two symmetrical lines from the knot, as shown in the example. Add another layer by with a rounded. Start drawing the side parts of the tie. Drawing a bow tie requires a slightly different approach than a ribbon bow. Make it narrower towards the knot and wider as it goes. Learn to draw a bow tie. Draw a third oval around the. This will be the knot of the bow tie. Add curves to the knot. Web start with drawing the center piece of the bow shape. Web a modern bow tie is tied using a common shoelace knot, which i. Web how to draw a bow tie. The corners of the middle of the bow square are rounded. Start drawing the side parts of the tie. Go ahead and add a bit more detail to make your bow look pretty. Draw an oval shape for the knot. Repeat the above instructions on the left side. Start drawing the side parts of the tie. The corners of the middle of the bow square are rounded. Draw two symmetrical lines from the knot, as shown in the example. Draw a long, curved line extending from one side of the knot. Web learning how to draw a bow tie is very simple! Add another layer by with a rounded. Add smaller triangles for the bow. Web draw two wavy lines at the top and bottom. Learn to draw a bow tie. Web it will represent the knot of the bow tie. It consists of a ribbon of fabric tied around the collar in a symmetrical manner such that the two. Repeat the above instructions on the left side. Draw an oval shape for the knot. This forms one side of the bow tie itself. Kids and beginners alike can now draw a great looking cartoon bow tie. To give the knot a realistic appearance, round off the corners of the rectangle slightly. Draw a small rectangle in the center of your page. In very little time, through a little repetition, you'll have the perfect bow tie drawing. Web start with drawing the center piece of the bow shape.
How to Draw a Bow Tie Really Easy Drawing Tutorial
How To Draw A Bow Tie

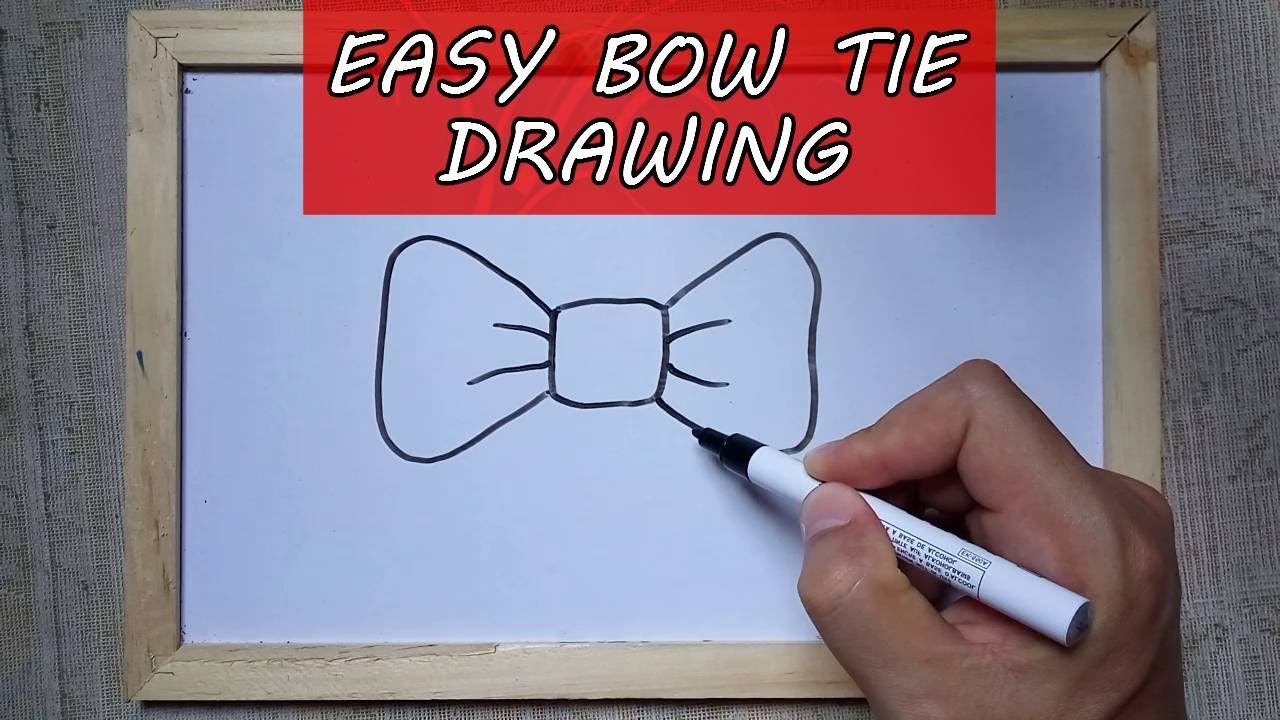
How to Draw a Bow Tie Easy Pictures to Draw YouTube

How to draw a Bow Tie easy step by step YouTube

How To Draw A Bow Tie In (4) Easy Steps For Kids
How to Draw a Bow Tie Outline Drawing Step by Step Sketch Tutorial

How to Draw a Tie Step by Step Tie Drawing Bow Tie Drawing YouTube
Cute Bow Tie Drawing
How to Draw a Bow Tie Easy Drawing Tutorial For Kids
How to Draw a Bow Tie A Fun and Easy Guide Improve Drawing
Web Draw The Center Knot Of The Bow Tie.
Web Learn To Draw A Bow Tie.
Web How To Draw A Bow Tie.
For This Guide On How To Draw A Tie, You Will Find It Much Easier If You Have A Ruler To Use, As There Are Lots Of Straight Lines In This Design.
Related Post: